Gruveo lets you create account users for any team members who you want to be able to organize or receive Gruveo calls. Each account user can log into Gruveo with their own email and password. A user (as identified by their email address) can only belong to one Gruveo account.
Admins vs. Regular Users
Once you sign up for Gruveo, you automatically become the account admin. Compared to regular users, account admins have the following additional privileges:
- Access to the account's billing
- Ability to manage the users and permanent links
- Ability to set the branding for permanent links
- Access to the account's call log and reports.
At the moment, Gruveo does not support having more than one admin in an account.
The Users Page
You can manage your account's users on the Users page in your dashboard. To open the page, do the following:
- Log into your account on the Gruveo website.
- Click “Users” in the menu to the left.
The Users page displays a list of all users in your Gruveo account, as well as the permanent links that are assigned to each user. To delete a user, click the trash can button next to them. Click the edit button to edit a user's details (see "Editing a User" below).
The "Assigned link" drop-down box lets you filter your users by the permanent link assigned to them.

The Users page lets you manage the users in your Gruveo account.
Adding a New User
To invite a new user to your Gruveo account, do the following:
- Go to the Users page in your account dashboard.
- Click the “Add User” button.
- On the page that opens, enter the user's full name and email address. This is the email address where the invitation will be sent to, and also the address they'll use for logging into Gruveo.
- Assign permanent links to the user as needed:
- To assign a link, select it in the "Available links" pane and click the ">>" button to move it to "Assigned links" for this user.
- To unassign a link, move it from "Assigned links" back to "Available links" by selecting it and clicking the "<<" button.
- You can select multiple links at once by holding the Ctrl key (Cmd on a Mac).
- Click "Add user" to invite the user to your Gruveo account.
The team member will receive an invitation email from Gruveo with a signup link. Once they click the link, they will be able to complete the signup by creating their Gruveo password. From then on, the user will be able to log into Gruveo with their email and password.
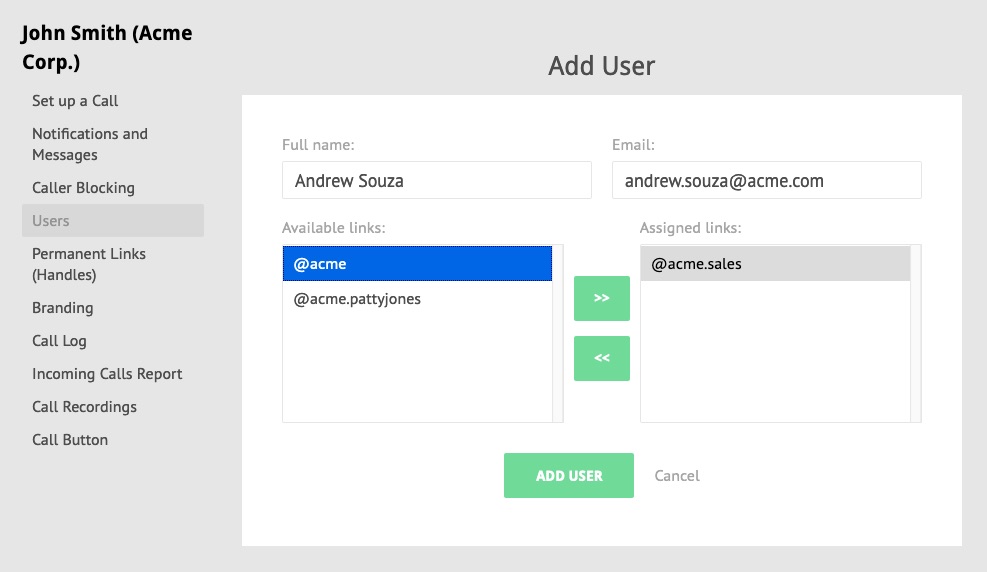
The Add User page lets you add a new account user.
Editing a User
To edit a user's details, go to the Users page and click the edit button next to their name.

Click the edit button to edit a user.
This will open the Edit User page that lets you change the user's full name as well as the permanent links assigned to them.
- To assign a link, select it in the "Available links" pane and click the ">>" button to move it to "Assigned links" for this user.
- To unassign a link, move it from "Assigned links" back to "Available links" by selecting it and clicking the "<<" button.
- You can select multiple links at once by holding the Ctrl key (Cmd on a Mac).
Click "Update user" to save your changes.

You can edit a user's details on the Edit User page.